

Key takeaways
- Clamp: saves surface area and gives a stable mounting point, especially on a crowded desk. It is the better choice when the lamp will stay in one position for months.
- Weighted base: works on desks with no accessible edge and is easier to move between workstations. The trade-off is a footprint commonly around 18–25 cm wide.
- Grommet mount: is the neatest permanent option if your desk already has a cable-management hole, but it requires drilling or an existing opening.
The best architect desk lamps for detailed work are usually a long-reach, spring-balanced lamp with a metal shade, a dimmable LED source, and a clamp sized for your desk; choose the Anglepoise Type 75 for the most refined all-round setup, the Artemide Tolomeo for premium movement and finish, or a wide-bar LED lamp when you need even coverage across drawings.
Our top picks


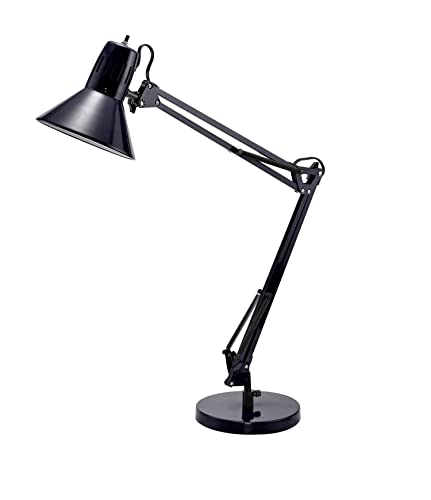

As an Amazon Associate we earn from qualifying purchases at no extra cost to you. Ratings are shown as listed on Amazon.
Best architect desk lamps at a glance
| Choice | Best for | Useful target specification | Typical market range in 2026 | Main compromise |
|---|---|---|---|---|
| Anglepoise Type 75 | Frequent drawing, drafting, and precision work | About 66 cm high, roughly 72 cm horizontal reach, articulated aluminium arms | About $250–$400, depending on finish and mount | Usually needs a separate LED bulb; the footprint or clamp adds cost |
| Artemide Tolomeo | Premium studios and long-term ownership | Aluminium arms, adjustable diffuser, desk base or clamp versions | About $350–$600 | Expensive, and some versions occupy more desk depth than expected |
| Luxo L-1 | Classic task lighting with a dependable spring-arm design | Long articulated arm, metal shade, clamp and base configurations | About $180–$350 | Less compact and less minimalist than newer integrated LED designs |
| Wide-bar LED desk lamp | Large plans, multiple monitors, and shared work surfaces | 80–110 cm light bar, 1,000–1,800 lumens, dimming and colour adjustment | About $80–$250 | Often has less precise arm positioning than a traditional architect lamp |
| Basic spring-arm lamp | Occasional sketching on a limited budget | 45–60 cm reach, E27 or similar replaceable bulb, clamp or weighted base | About $25–$100 | Joints may drift, vibrate, or loosen under frequent repositioning |
What matters most for detailed work
Arm reach and usable coverage
A lamp that reaches only the back edge of your desk can leave the lower drawing area in shadow. For an ordinary 120–160 cm-wide desk, look for at least 60 cm of horizontal reach and approximately 60–75 cm of vertical adjustment. A 70–90 cm reach is more useful for A2 drawings, large sketchbooks, and desks deeper than 75 cm.
Reach is not the same as coverage. A narrow shade creates a concentrated pool of light, while a wide LED bar spreads light across a larger area. For detailed line work, a focused shade is helpful when it can be moved close to the page. For plans, models, or a keyboard-and-paper arrangement, broader coverage usually reduces the need to keep repositioning the lamp.
Joint stability beats maximum flexibility
The most useful arm has enough resistance to stay where you put it without requiring excessive force. Spring-balanced arms are generally better for repeated adjustment than friction-only hinges. Check whether the arm can hold its position with the shade extended horizontally; that is where weak springs and loose joints become obvious.
More joints are not automatically better. Four or five loose adjustment points can make a lamp wobble. For drafting, prioritise a firm base joint, a rigid main arm, and a shade that can tilt independently. If your desk is near a wall or other equipment, confirm that the rear arm will not collide with it during adjustment.
Clamp or base?
- Clamp: saves surface area and gives a stable mounting point, especially on a crowded desk. It is the better choice when the lamp will stay in one position for months.
- Weighted base: works on desks with no accessible edge and is easier to move between workstations. The trade-off is a footprint commonly around 18–25 cm wide.
- Grommet mount: is the neatest permanent option if your desk already has a cable-management hole, but it requires drilling or an existing opening.
Measure the desk before ordering. Many clamps accept surfaces from roughly 10 mm to 50 mm thick, while some compact models stop at 35–40 mm. A thick desktop, rear cable tray, raised lip, or monitor shelf may prevent the clamp from seating fully. Allow another 5–10 mm for a protective pad or felt layer.
Brightness and colour temperature for precision tasks
Brightness control is more useful than a very high maximum output. A practical lamp should dim low enough for screen work and reach roughly 800–1,500 lumens for paper-based detail work. On a 0.5 m² drawing area, 1,000 lumens does not mean the paper receives 2,000 lux: losses from distance, shade shape, and beam spread matter. A lamp that is 40 cm above the page may provide substantially more useful illumination than the same lamp positioned 70 cm away.
Choose a colour rendering index of at least CRI 90 when you need to distinguish coloured pencils, ink washes, printed samples, or model materials. CRI 80 can be adequate for monochrome drafting and general computer work, but it is a weaker choice for colour-sensitive design decisions.
- 2700–3000 K: warm and comfortable, but can make white paper appear yellow.
- 3500–4000 K: the most versatile range for drawing, reading, and mixed office work.
- 5000–6500 K: crisp and useful for some colour-matching tasks, but potentially harsh beside a warm room.
Avoid buying solely on colour-temperature range. Some inexpensive lamps change colour by mixing separate LEDs, which can produce uneven colour across the page. A replaceable high-CRI bulb gives you an easier upgrade path, while integrated LED models can be slimmer and better at distributing light but may require replacing the entire lamp when the electronics fail.
Decision matrix: which type fits your situation?
| Your situation | Best fit | Why |
|---|---|---|
| Detailed work several hours every day | Premium spring-arm lamp with clamp or grommet mount | Stable positioning and replaceable or high-quality lighting justify the higher initial cost |
| Occasional sketching and a tight budget | Basic clamp lamp with an E27 LED bulb | Low entry cost and inexpensive bulb replacement |
| Desk under 60 cm deep | Shorter arm or wide-bar lamp | A very long arm can push the shade behind the working area or hit a wall |
| Desk over 75 cm deep or large-format plans | 70 cm-plus reach or wide-bar lamp | Better coverage without placing the lamp directly over the page |
| Desk has a thick top or rear cable tray | Weighted base or a clamp rated above the measured thickness | Prevents insecure clamping and damage to the desk edge |
| You regularly change workstations | Weighted base with a manageable cable | It can move without installing hardware at each desk |
Head-to-head: traditional arm lamp versus wide-bar LED lamp
A traditional architect lamp wins when precision positioning matters. You can place the shade close to a particular corner of a drawing, angle it away from a glossy surface, and move it without changing the whole lighting pattern. Anglepoise Type 75, Artemide Tolomeo, and Luxo L-1 represent this approach, although their exact mount, bulb, and finish options vary.
A wide-bar LED lamp wins on uniformity. Its long source can cover a keyboard, notebook, tablet, and paper simultaneously, making it particularly practical for design software alongside physical references. It is usually thinner and easier to keep out of the way, but the arm may not hold a precise angle as confidently as a well-balanced spring arm. For one small drawing area, the traditional lamp is usually the more controllable tool; for a broad workstation, the bar is often more efficient.
Setup details that prevent glare and wobble
- Place the lamp on the opposite side of your dominant writing hand. This reduces the shadow cast by your hand across the line you are drawing.
- Position the shade roughly 35–60 cm above the page, then reduce brightness before moving it closer. Distance changes both illuminance and glare.
- Angle the shade across the page rather than directly toward your eyes. Glossy paper, tablets, and varnished models reflect a direct beam.
- Tighten the clamp by hand until secure, but do not crush a wood or laminated edge. Use the supplied pad or a thin felt protector.
- Check the arm after moving the desk. A clamp that was stable on one edge can loosen after repeated vibration or a change in desktop thickness.
Ownership realities and common mistakes
The first parts to wear are usually clamp pads, hinge friction washers, springs, and LED controls—not the metal arm itself. A loose hinge can sometimes be corrected with the manufacturer’s replacement washer or a carefully adjusted fastener; overtightening can make the arm difficult to move and accelerate wear. Dust the shade and joints with a dry microfiber cloth, and keep vents clear on integrated LED models.
Do not exceed the lamp’s recommended bulb wattage, even if an LED bulb runs cooler than an old incandescent bulb. Do not rely on a small base for a fully extended arm: the greater the reach, the more likely the lamp is to tip. Finally, avoid placing the lamp directly behind a monitor unless the arm is long enough to bring the light forward; otherwise the screen can block the useful beam while the lamp still occupies valuable space.
For most people, the best architect desk lamps are selected by mount and arm behaviour before appearance. Choose a proven spring-arm design when you need precise, repeated repositioning; choose a wide-bar LED when you need broad, even desk coverage; and confirm clamp capacity, colour quality, and replacement options before paying for premium styling.


Write Your Review
No reviews yet. Be the first to share your experience!